Puzzle Cube Project!
Myself with my finished Puzzle Cube!
Define a Problem
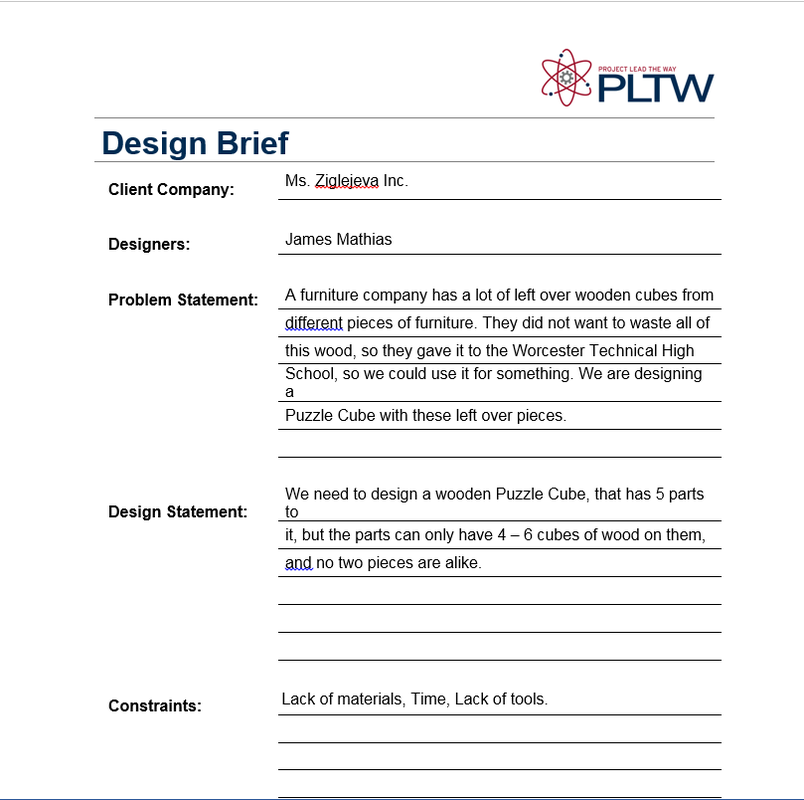
This is my Design Brief for the Puzzle Cube Project, using the PLTW template.
Generate Concepts
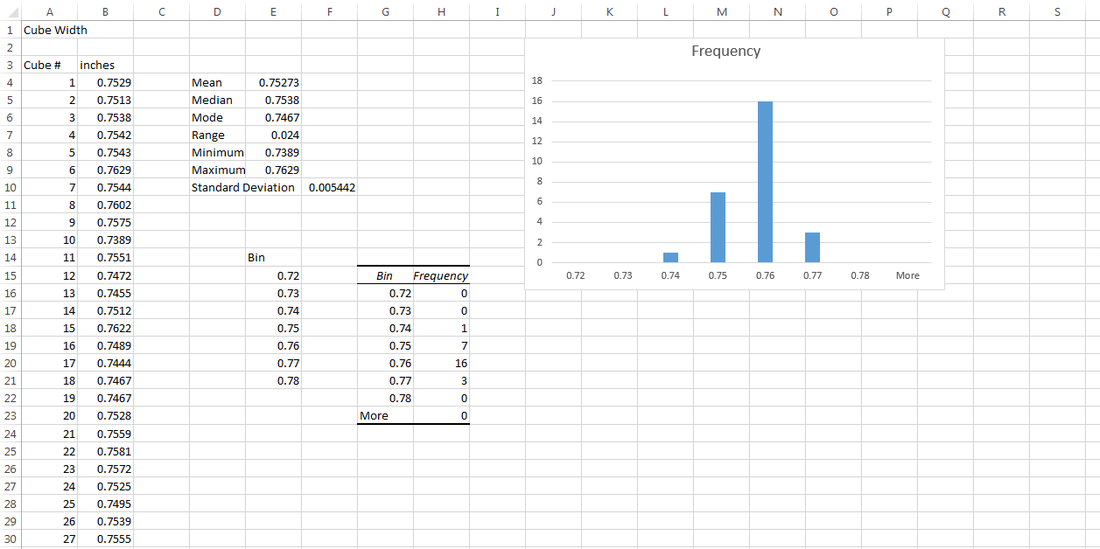
This is my Excel chart of all my cubes, and all of the data for them. I measured all of these pieces using a dial caliper, and I measured all of my cubes in inches. The acceptable range is basically the mean, with the standard deviation added on one side, and subtracted on another side. These 2 numbers will be your acceptable range.
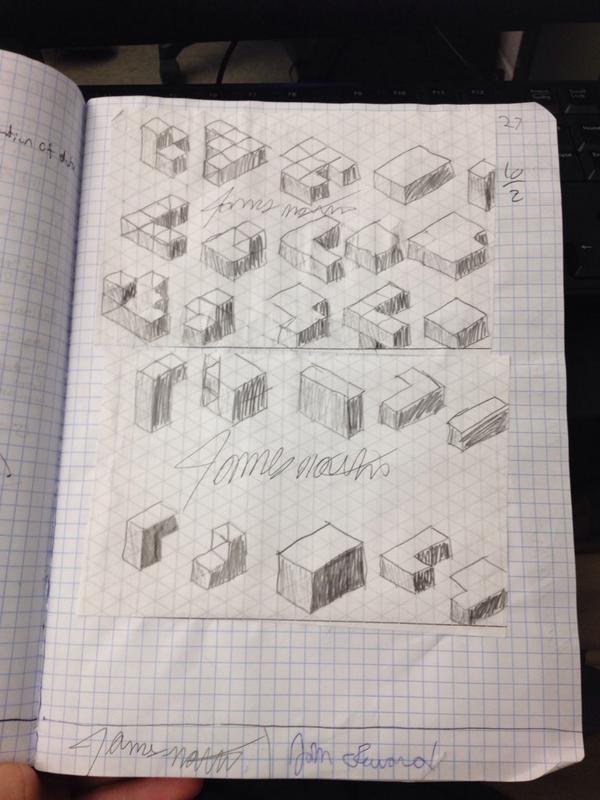
These are all isometric sketches for my Puzzle Cube. These were all made to show different possible designs for my puzzle cube.
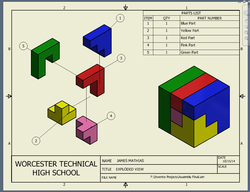
These are all the pieces of my Puzzle Cube modeled in Inventor. We learned how to use Inventor, modeled, and colored all of these pieces within a weeks time!
Develop Solution
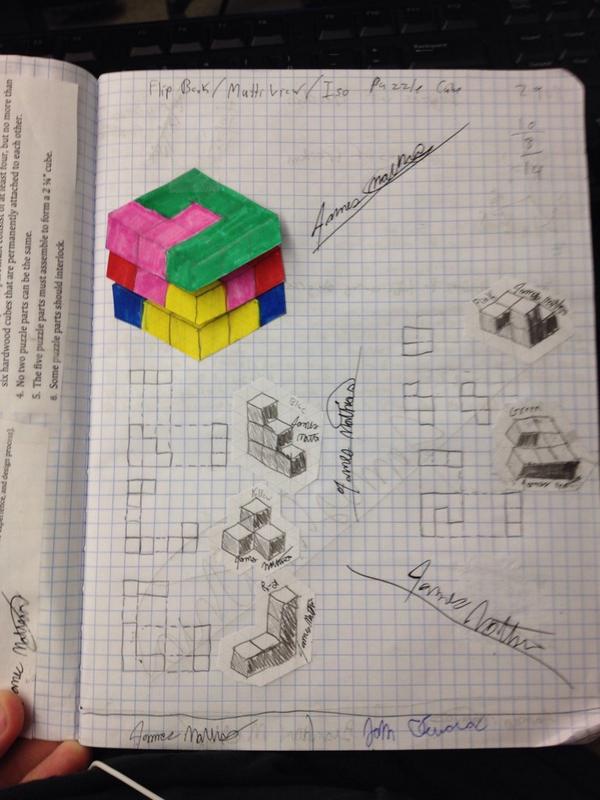
Here are my Multi-View sketches of my final product, and my flip book for my puzzle cube.
Here are close-up snapshots of my Multi-View sketches.
These are multi-view sketches of my pieces, and they are all dimensioned properly. We did all of this in Inventor, using a specific template.
Construct and Test Prototype
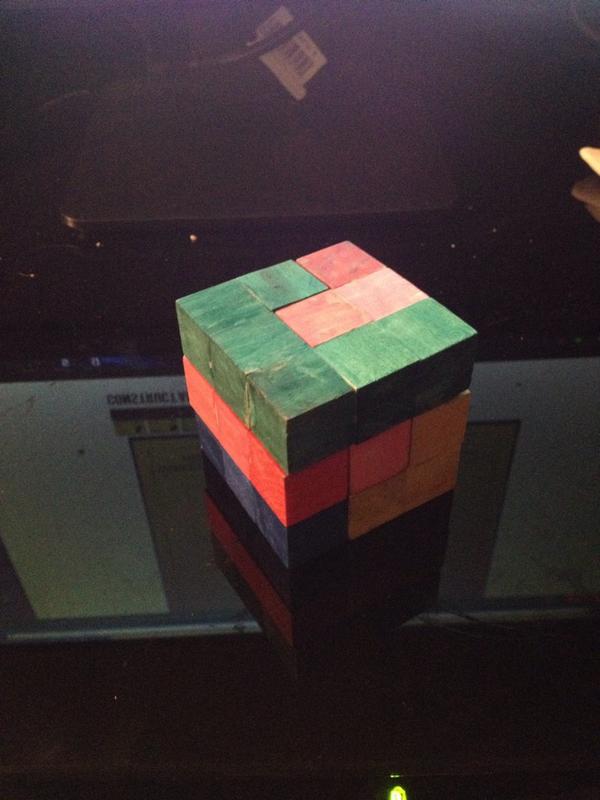
This is a real life view of the top right left corner of my puzzle cube.
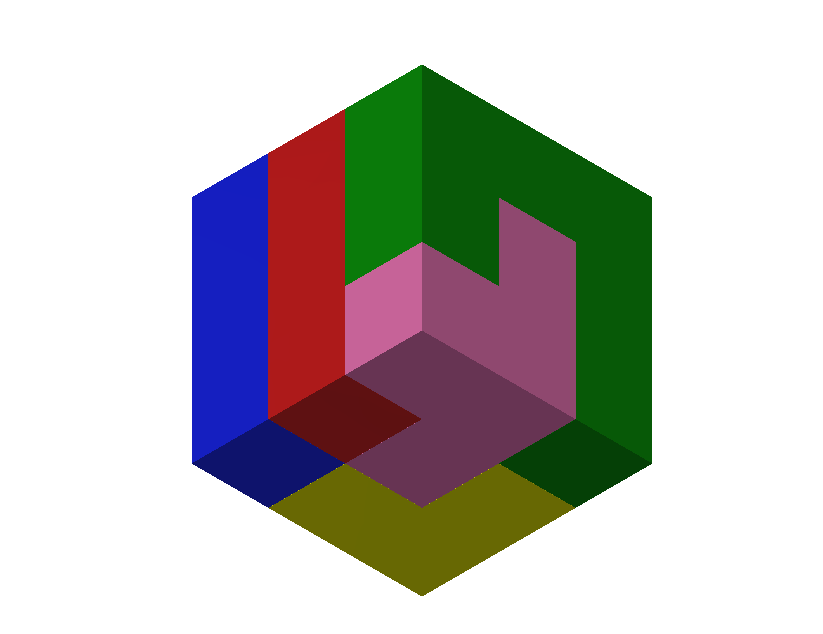
This is a picture of my puzzle cube that I made in Inventor using all of the separate pieces that I modeled, all constrained together to make my Puzzle Cube. There are no Degrees of Freedom left on this cube.
Degrees of freedom are basically all of the directions that an item can move. Originally, there is a Z, X, and Y degree, but by using different constraints, you can constrict these degrees down to zero. That is what I had to do with my assembled cube, there had to be zero degrees of freedom left.
Here is a large drawing of my Puzzle Cube.
Evaluate Solution
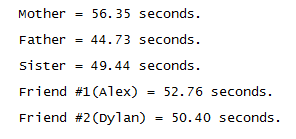
These are all the times of my mother, father, sister, and 2 friends. I would change my design some, because I find it to be a bit too easy to complete, so I would definitely make it more complex. I would also change the colors some, as I feel the yellow and the pink a bit hard to see..
Present Solution
We started off this project with picking out, measuring, and recording our cubes. We plugged all the numbers into Excel, and got all the data from them all. We then calculated the standard deviation, and made sure all the cubes lined up inside one standard deviation. Next, we started to actually come up with designs, and build our cubes. This took some time, because we had to come up with 5 designs, with 5 parts in each design. After we were done building these cube part's, we started to model them in Inventor. Inventor was very complicated at first, as it was a very different program then what I had used before, but it had gotten easier as I had gone on. The design process basically went: Brainstorming, Isometric Sketching, Multi-View Sketching, Building, Coloring, Modeling, Dimensioning, and now finishing our website's. The full project took a couple of weeks, because there was a lot to do, but here is my final product of my Puzzle Cube project, website and all. I hope you liked my Puzzle Cube Project!
